Kanafa is a classic Middle Eastern dessert known for its crispy pastry and soft, gooey cheese center. While it may look complex, you can easily recreate it at home with the right ingredients and a few simple techniques.
The result is a homemade masterpiece that’s meant to be served warm. Let’s walk through the process together.
History and Origins of Kanafa
Kanafa is a traditional dessert from the Levant region, widely enjoyed in countries such as Palestine, Lebanon, Syria, and Jordan. While its exact origin is debated, it has become a staple across the Middle East and Mediterranean.
Over time, different regions have developed their own variations, using unique ingredients and flavorings while preserving the signature combination of crispy pastry and sweet cheese filling.
Local creativity has led to wonderful regional twists over the years. Each area puts its own signature on the core recipe.
@the_flavour_vault Knafeh/ kunafa/kanafeh which originates from the Palestinian streets of Nablus is said to have been founded in the early parts of the last century. The pastry spread from the Arab lands to neighboring countries including Iran and Greece and Turkey, where slight variations of the dish are now popular. It’s originally made with Nabulsi cheese, a cheese that is one of Palestine’s most popular white brined cheeses and topped with either sugar syrup soaked noodles (knafeh kheshne) or semolina dough (knafeh na’ama). Before the sugary toppings, however comes a layer of heated cheese that has been soaked in sugar syrup, made to stretch as far as the arm can reach. The dessert is typically marinated with either rose water or orange blossom water, complimenting the sweetness with small hints of salt from the cheese perfectly. In Arabic, the name may refer to the string pastry itself, or to the entire dessert dish. In Turkish, the string pastry is known as tel kadayıf, and the cheese-based dessert that uses it as künefe. In the Balkans, the shredded dough is similarly known as kadaif/cataif, and in Greece as kataifi, and is the basis of various dishes rolled or layered with it, including dessert pastries with nuts and sweet syrups. I personally love when the syrup is hit with a little orange blossom or rose water, but that didn’t seem to be too common in Greece where I had this last, but still delicious nonetheless. #Kunafa #knafeh #kanafeh #freepalestine #palestine #endtheoccupation #dessert #foodtiktok #foodie #athens #athensfood #food ♬ original sound – The_Flavour_Vault
| Region | Distinctive Feature | Common Occasion |
|---|---|---|
| Palestine | Bright orange color from food coloring | Ramadan iftar, celebrations |
| Lebanon | Heavy use of rose water syrup | Family gatherings, weddings |
| Syria | Often includes clotted cream (qashta) | Street food, festivals |
| Jordan | Famous for its street-side bakeries | National pride, daily treat |
Essential Ingredients and Tools
To recreate the authentic texture and flavor, selecting the right ingredients is your first crucial step. Let’s break down what you need.
- Kataifi Dough (Shredded Phyllo): Kataifi dough consists of thin strands of phyllo pastry that create the signature crispy texture. To achieve an even golden result, coat the strands thoroughly with melted ghee or butter before baking.
- Cheese Filling: Traditional recipes use Akkawi or Nabulsi cheese, which are mild and slightly salty. If unavailable, a mix of ricotta and mozzarella works well, providing a creamy texture and light stretch.
| Cheese Type | Flavor Profile | Best For | Preparation Tip |
|---|---|---|---|
| Akkawi or Nabulsi | Mild, slightly salty | Authentic traditional flavor | Soak in water to reduce saltiness if needed |
| Ricotta & Mozzarella Blend | Creamy, mild, stretchy | Easy-to-find alternative | Mix equal parts for balanced texture |
| Other Soft White Cheeses | Varies | Experimentation | Ensure low moisture to prevent sogginess |
Using high-quality ghee is key to that golden color. A reliable non-stick pan makes the cooking process smooth. These tools help you achieve professional results at home.
Step-by-Step Guide to Prepare the Kanafa Bowl
Your 9-inch pan and a bowl of melted ghee are your primary tools for this stage. This recipe is efficient, with a total prep time of around 20 minutes.
1. Prepare the Dough
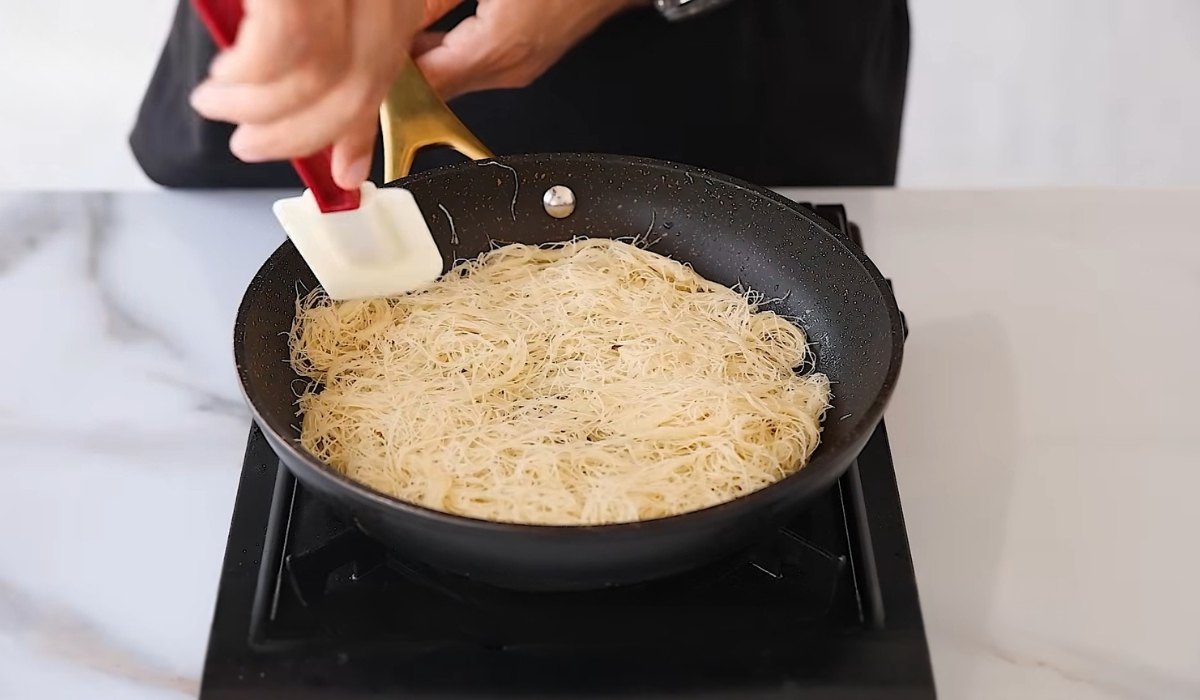
Start by gently separating the kataifi strands with your fingers so they are loose and fluffy. This step is important to avoid clumping and ensure even crisping. Drizzle melted ghee (or butter) over the dough and mix thoroughly, making sure every strand is lightly coated.
2. Create the Base Layer
Lightly grease a pan (about 9 inches). Take half of the buttered dough and press it firmly into the bottom of the pan. Make sure the layer is even and slightly compact, especially around the edges, to create a stable base that will hold the filling.
3. Add the Cheese Filling
In a bowl, mix ricotta and shredded mozzarella until well combined. Spread the mixture evenly over the base layer, leaving a small border (about 1 cm) around the edges to prevent the cheese from leaking during cooking.
4. Add the Top Layer
Place the remaining kataifi dough over the cheese filling. Spread it evenly and gently press down to seal the layers together without compressing too much. Make sure the surface is level so it cooks evenly and develops a consistent golden color.
| Step | Task | Approx. Time |
|---|---|---|
| 1 | Loosen & coat dough with ghee | 5 minutes |
| 2 | Press base layer into pan | 3 minutes |
| 3 | Mix cheese filling | 4 minutes |
| 4 | Assemble layers in pan | 8 minutes |
| Total | Preparation Complete | 20 minutes |
A viral YouTube video with over 1.7 million views sparked a home baking revolution. Thousands of people saw the original knafeh recipe and successfully recreated it. This proves the dish’s massive global popularity.
How to Achieve a Crispy Texture
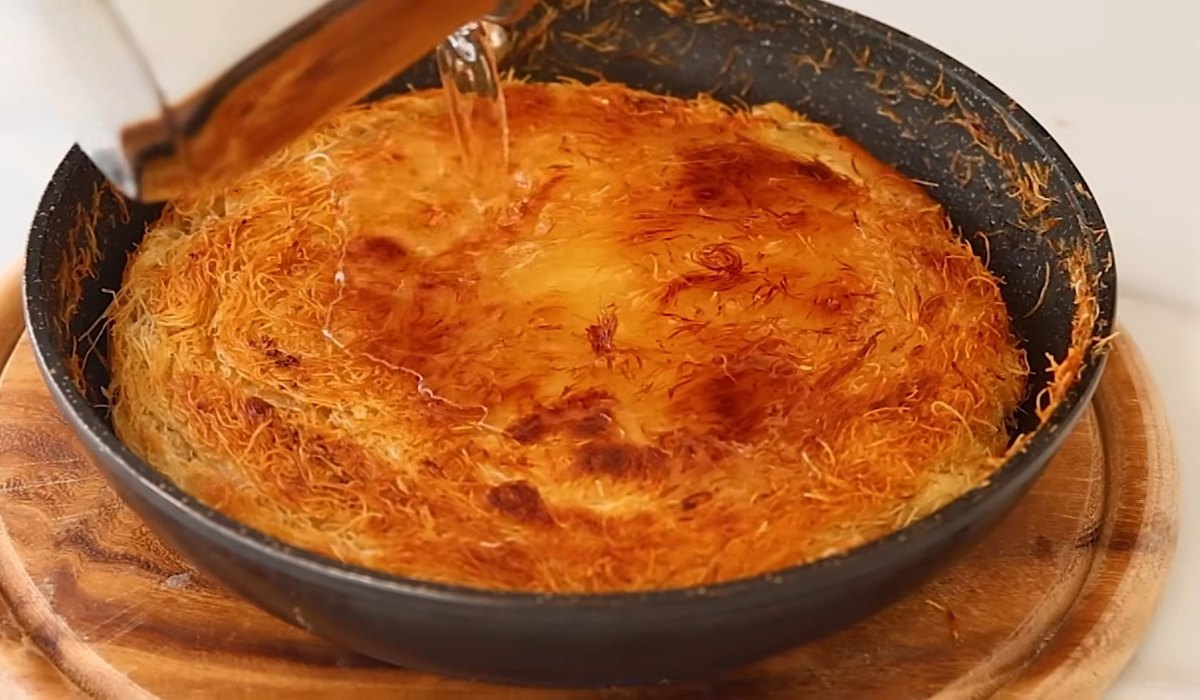
Cook the kanafa over medium heat on the stovetop for about 5 minutes, or bake at 375°F (190°C) for 25–30 minutes until golden brown. Using enough ghee or butter ensures even crisping and prevents dryness.
Watch for a crisp top and melted cheese inside.
The final, defining moment of this dessert lies in achieving that signature, audible crunch. This step transforms your assembled layers into the iconic treat. Proper technique ensures a golden shell with a soft, gooey center.
Preparing the Sweet Syrup
The syrup is a key element that brings moisture, sweetness, and aroma to the kanafa. Getting the texture and timing right is essential for the final result.
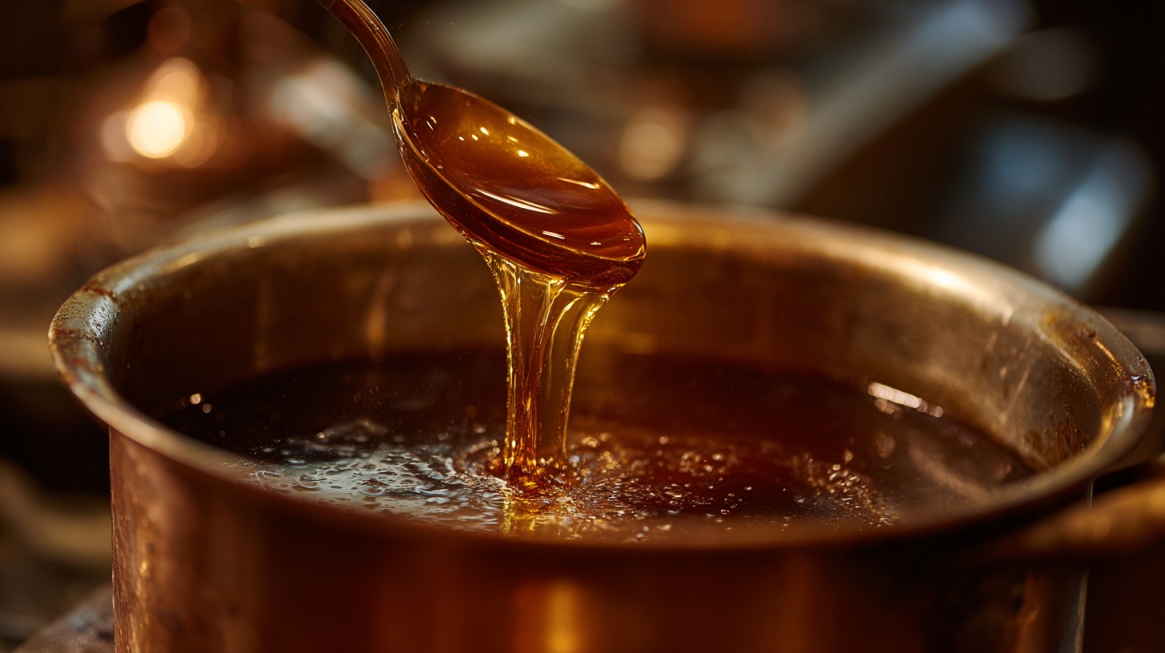
Start by combining 1 cup of water and 125 g of sugar in a small saucepan. Place it over medium heat and stir until the sugar completely dissolves. Once it reaches a gentle boil, reduce the heat and let it simmer for about 5–6 minutes, until it slightly thickens.
- 1 teaspoon of lemon juice (to balance the sweetness and prevent crystallization)
- 1–2 teaspoons of rose water or orange blossom water for aroma
Stir well and allow the syrup to cool completely before using.
Important tip for perfect texture
Always pour cool syrup over hot kanafa right after cooking. This contrast helps the pastry absorb the sweetness without becoming soggy, keeping the outer layer crisp while the inside stays soft.
- Reduce sugar slightly if you prefer a less sweet dessert
- Use orange blossom water instead of rose water for a lighter, citrusy flavor
- Add a thin slice of lemon while simmering for extra depth
The syrup should be smooth, lightly thickened, and fragrant, not too heavy or sticky.
Serving Suggestions
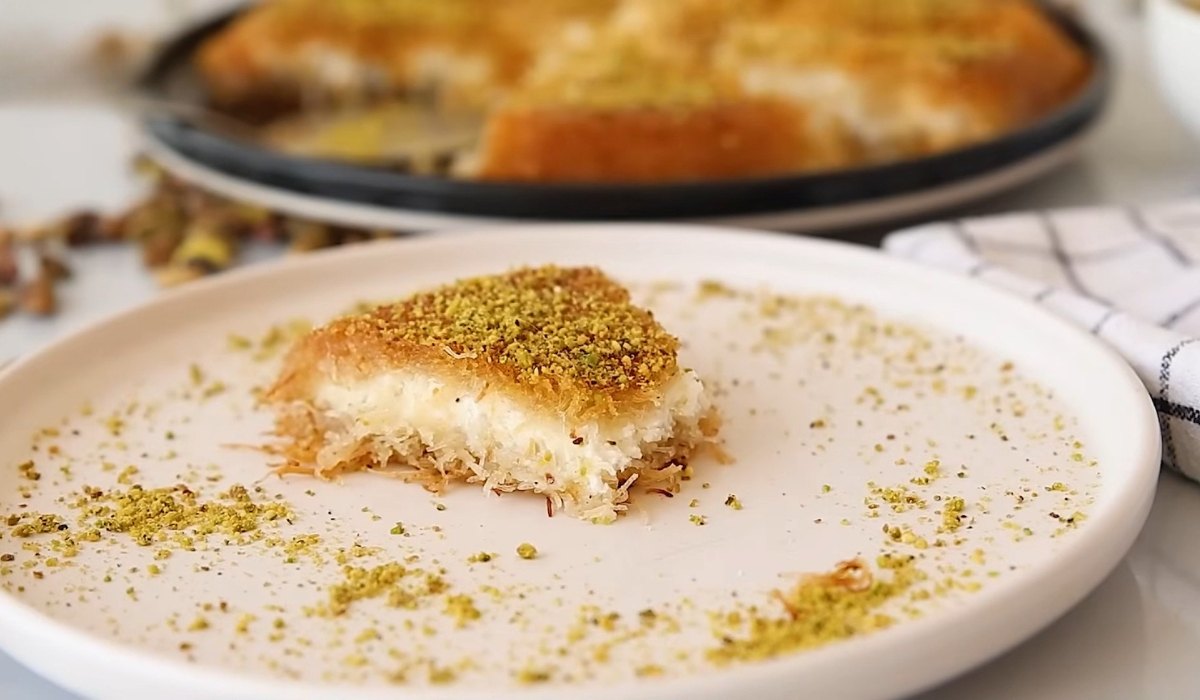
Once the kanafa is fully cooked and golden brown, remove it from the heat and immediately pour the cooled syrup evenly over the hot pastry. This step is essential for achieving the perfect balance of sweetness while keeping the exterior crisp.
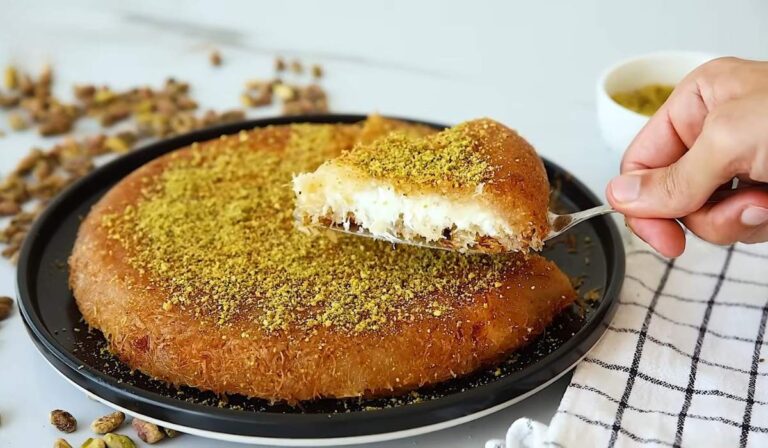
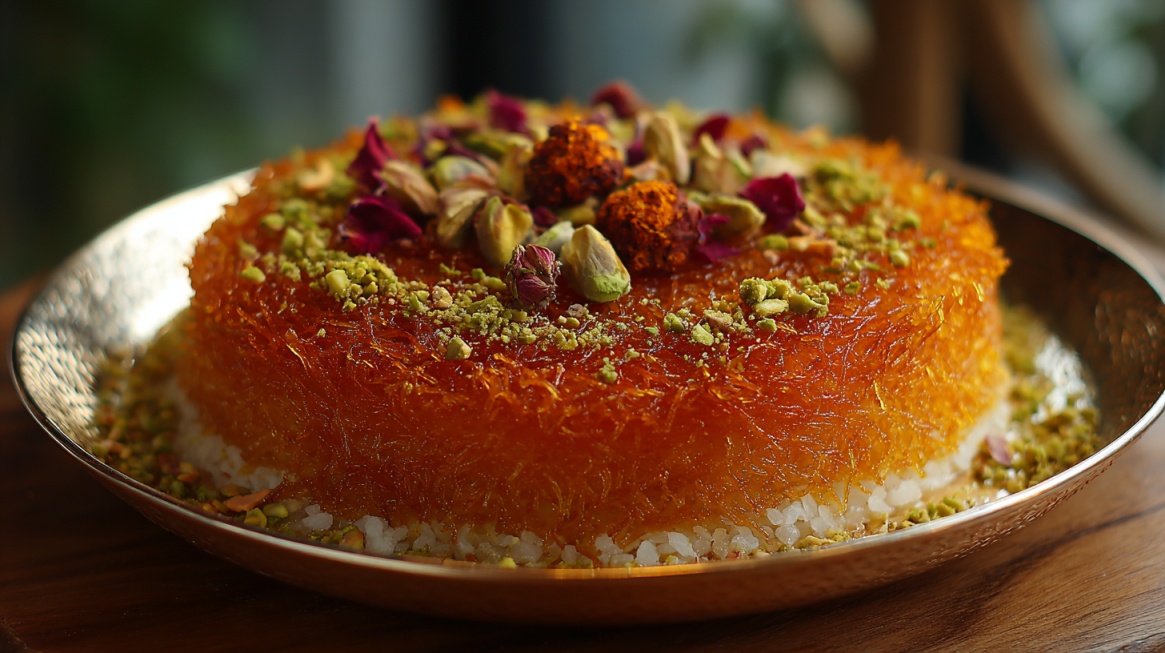
Let the syrup absorb for a minute or two, then garnish generously with finely chopped pistachios for added crunch and color. For a more traditional and aromatic touch, you can also add a few edible dried or fresh rose petals on top.
For best results, serve kanafa warm, shortly after preparation. This is when the contrast between the crispy outer layer and the soft, stretchy cheese filling is at its peak.
- as a whole dish for sharing
- sliced into squares or wedges
- or in individual portions for a more elegant presentation
Optional additions:
- a light drizzle of extra syrup just before serving
- a scoop of vanilla ice cream for a modern twist
Avoid letting it sit too long before serving, as the pastry may lose its crispiness over time.
Storing and Reheating Leftovers
Once the syrup is added, allow it to soak in for a minute, then garnish the kanafa with finely chopped pistachios for added crunch and color. For a more traditional presentation, you can also add a few rose petals for a subtle aromatic touch.
Serve the kanafa immediately while warm to fully enjoy the contrast between the crispy pastry and the soft, gooey cheese filling.
You can present it as a whole dish for sharing or cut it into individual portions for easier serving.
@the_flavour_vault Knafeh/ kunafa/kanafeh which originates from the Palestinian streets of Nablus is said to have been founded in the early parts of the last century. The pastry spread from the Arab lands to neighboring countries including Iran and Greece and Turkey, where slight variations of the dish are now popular. It’s originally made with Nabulsi cheese, a cheese that is one of Palestine’s most popular white brined cheeses and topped with either sugar syrup soaked noodles (knafeh kheshne) or semolina dough (knafeh na’ama). Before the sugary toppings, however comes a layer of heated cheese that has been soaked in sugar syrup, made to stretch as far as the arm can reach. The dessert is typically marinated with either rose water or orange blossom water, complimenting the sweetness with small hints of salt from the cheese perfectly. In Arabic, the name may refer to the string pastry itself, or to the entire dessert dish. In Turkish, the string pastry is known as tel kadayıf, and the cheese-based dessert that uses it as künefe. In the Balkans, the shredded dough is similarly known as kadaif/cataif, and in Greece as kataifi, and is the basis of various dishes rolled or layered with it, including dessert pastries with nuts and sweet syrups. I personally love when the syrup is hit with a little orange blossom or rose water, but that didn’t seem to be too common in Greece where I had this last, but still delicious nonetheless. #Kunafa #knafeh #kanafeh #freepalestine #palestine #endtheoccupation #dessert #foodtiktok #foodie #athens #athensfood #food ♬ original sound – The_Flavour_Vault
Troubleshooting and Pro Tips for a Flawless Recipe
Even experienced bakers can encounter a few hurdles when making this iconic dessert. These professional tips will help you navigate common issues and achieve perfect results every time.
Mastering the flip is a key skill. Use a plate slightly larger than your pan for confidence.
“The contrast between hot pastry and cool syrup is non-negotiable for that signature crispness.” – Traditional Baker
- Always pour cool syrup over hot kanafa to keep it crispy
- Coat dough evenly with ghee for uniform browning
- Soak salty cheeses like akkawi before use
- Use a plate slightly larger than the pan when flipping
| Common issue | Likely cause | Pro solution |
|---|---|---|
| Soggy pastry | Syrup poured while still warm or pastry cooled too long | Always use completely cooled syrup on hot knafeh |
| Cheese too salty | Using traditional cheese without soaking | Soak akkawi cheese in water for 1-2 hours before use |
| Uneven browning | Inconsistent ghee coating or heat | Coat every dough strand evenly and monitor pan heat |
Keep your extra syrup in a separate container until serving. This is one of the most important tips for preserving the perfect texture of your finished cake.
Final Words
Kanafa is a dessert that combines simple ingredients with rich tradition and incredible flavor. With the right technique and a few key tips, you can easily recreate this classic treat at home.
These tips ensure success in just a few minutes of active time. I hope this guide empowers you to explore richer culinary traditions!ž
Also Read: If you thought this recipe is unique and weird, check out this recipe on dessert tacos!