
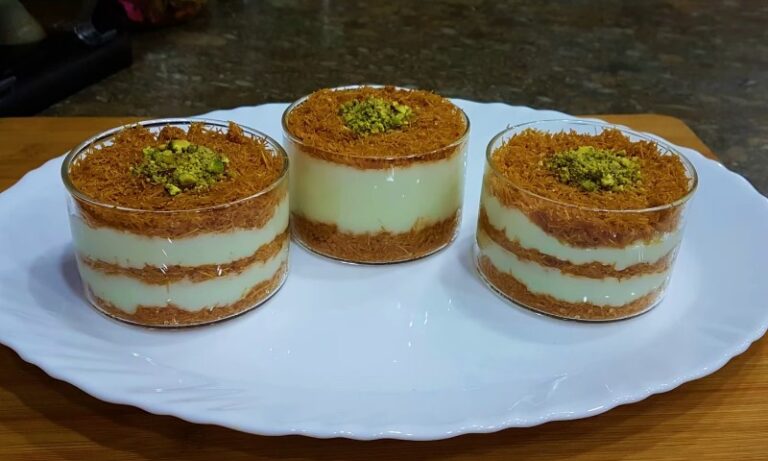
Imagine a stunning sweet that becomes the star of your table. This rich dessert is perfect for family gatherings and holidays. It brings the warm, authentic flavors of the Middle East right to your home.
Food expert Tasbih from Cleobuttera shared her detailed guide to help anyone master this treat. Her recipe focuses on a perfect balance. You get a crispy, shredded phyllo crust paired with a luxuriously smooth, pudding-like filling.
Whether you’re hosting a dinner or celebrating a special day, this dish makes a sophisticated impression. Your guests will remember the experience for years. It turns a simple meal into a festive occasion.
You can recreate these authentic flavors in your own kitchen. By following professional techniques for temperature and measurements, success is assured. For another classic take, explore this recipe for traditional knafeh with cream. Let’s start creating a memorable dessert today.
Introduction to Kanafa Bowl With Cream
Across the Middle East, the scent of baking kunafa signals a time for family, festivity, and indulgence. This iconic pastry is a cornerstone of celebratory meals.
For generations, it has graced tables during holidays and the holy month of Ramadan. Many families cherish it as the sweet highlight after a long day of fasting.
“The first bite—crunchy, sweet, and luxuriously creamy—is a moment of pure celebration.”
Learning to make kunafa in your own kitchen is deeply rewarding. You gain full control over the quality of the rich cream filling and the perfect golden crispness of the crust.
While there are many versions of these traditional desserts, the one featuring a smooth, pudding-like center remains a top choice. The beautiful contrast between textures is simply irresistible.
Mastering this classic treat does require a bit of patience. Your effort pays off with a professional-quality creation that brings joy to any special occasion.
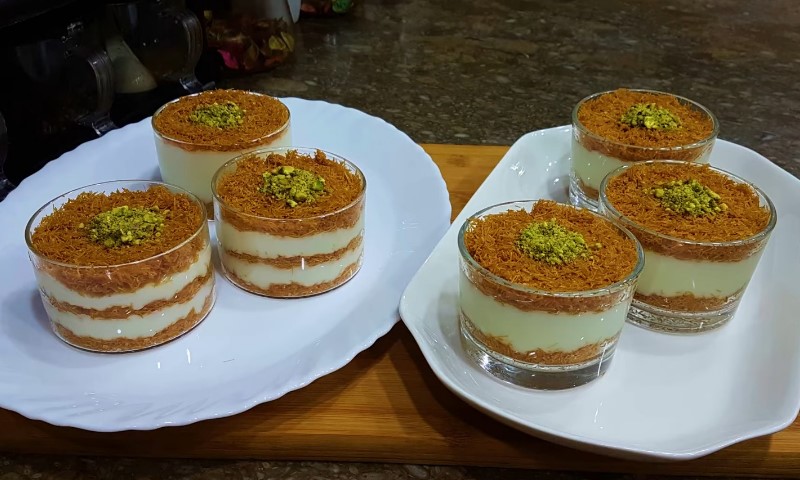
Kanafa Bowl With Cream Recipe
Ingredients
Equipment
Method
Step 1: Prepare the Sugar Syrup
In a saucepan, combine sugar, water, and lemon juice.Bring to a boil over medium heat.Let it simmer for about 10 minutes until slightly thickened (like thin maple syrup).Remove from heat and stir in rose water and orange blossom water.Set aside to cool.
Step 2: Make the Cream Filling
In another saucepan, whisk together milk, heavy cream, sugar, and cornstarch until smooth.Place over medium heat and whisk continuously.Bring to a gentle boil (about 5 minutes) until thick and pudding-like.Remove from heat and stir in rose water and orange blossom water.Let it cool slightly.
Step 3: Prepare the Kunafa Dough
Keep kunafa dough semi-frozen for easier handling.Cut into 1-inch pieces using scissors.Pour melted ghee over the dough.Mix thoroughly with your hands, ensuring all strands are coated.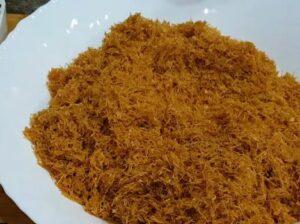
Step 4: Assemble the Kanafa Bowl
Preheat oven to 390°F (200°C).Press two-thirds of the buttered dough firmly into the bottom and sides of the pan.Use a measuring cup to compress it tightly.Pour the cream filling evenly over the base.Add the remaining dough on top and gently press.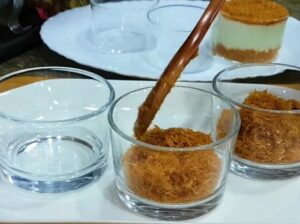
Step 5: Bake & Serve
Place in the oven on the lower-middle rack.Bake for 45 minutes until golden brown.If browning too quickly, lower heat to 350°F (180°C).Remove from oven and immediately pour cooled syrup evenly over the hot kanafa.Let it absorb for a few minutes.Serve warm.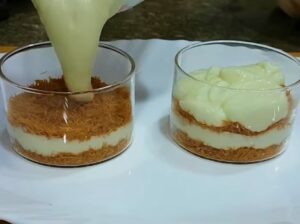
Video
Notes
Cooking Tips
- Always coat kunafa thoroughly with ghee—this ensures crispiness.
- Press the base firmly to prevent the filling from leaking.
- Do not over-soak with syrup; add gradually.
- For extra flavor, garnish with crushed pistachios.
- Serve warm for the best texture and taste.
How to Assemble Your Kanafa Bowl With Cream
Assembling your pastry is the most rewarding part of the entire process. You will bring together the crispy, buttery crust and the smooth, fragrant filling.
Building the Base and Crust
Start by taking the majority of your buttered dough. Press it firmly into the bottom and up the sides of your baking pan.
Use a flat-bottomed cup to compact it. This creates a solid, walled crust that will securely hold the rich cream filling.
Layering the Cream Filling and Dough
Carefully pour your cooled cream filling into the center of this crust. Gently spread it into an even layer with the back of a spoon.
Take the remaining third of your dough. Scatter it loosely over the top of the filling. A light press helps it adhere without compacting the layers.
Bake the assembly until the top is a deep golden brown. Let it rest briefly after removing it from the oven.
This allows the structure to set. Carefully flip it onto a serving platter. Finish by drizzling the aromatic sugar syrup over the warm dessert for a perfect, glossy finish.
Enhancing Your Dessert with Garnishes
The final flourish of garnishes transforms your baked creation from delicious to dazzling. This simple step adds professional polish and personal touch.
Chopped pistachios are a classic choice. They provide a wonderful crunch and a vibrant green color against the golden pastry.
Dried rose petals offer a beautiful visual contrast. They also reinforce the delicate floral notes already present in your sugar syrup.
Together, these toppings make your dessert look as impressive as it tastes. Your guests will appreciate the extra attention to detail.
For serving, consider placing extra syrup in a small pitcher. This lets everyone adjust the sweetness of their warm portion to their own liking.
Always add your garnishes right before you bring the dish to the table. This keeps the pistachios crunchy and the rose petals colorful and intact.
| Garnish | Primary Contribution | Best Paired With | Serving Tip |
|---|---|---|---|
| Chopped Pistachios | Texture & Color | Simple Syrup | Sprinkle liberally for crunch |
| Dried Rose Petals | Aroma & Visual Appeal | Rose Water Syrup | Use sparingly for elegance |
| Extra Simple Syrup | Customizable Sweetness | All Garnishes | Serve on the side in a pitcher |
| Orange Blossom Syrup | Floral Flavor Boost | Pistachios | Drizzle lightly over slices |
Middle Eastern Culinary Traditions and Variations
The heart of Middle Eastern sweets lies in their aromatic essence, often captured in a single drop of floral water. These traditions are passed down through generations, creating a strong cultural bond.
Each family might have its own special twist on a classic recipe. This makes every experience unique and personal.
Signature Flavors: Orange Blossom and Rose Water
Orange blossom water and rose water are the soul of many regional desserts. They provide a delicate, floral aroma that is instantly recognizable.
Just a teaspoon can transform a simple syrup into something magical. These ingredients are staples in pantries across the Levant.
Blossom water is not just for taste. It also adds a layer of fragrance that enhances the entire eating experience.
Ramadan and Special Occasions
During the holy month of Ramadan, families gather to break their fast. Sharing a warm, sweet dish like kunafa is a cherished ritual.
This practice turns an ordinary day into a celebration. It reinforces community and togetherness.
Weddings, holidays, and family dinners often feature this beloved dessert. The act of preparing it together is as important as the final result.
| Variation | Region | Dough Texture | Signature Note |
|---|---|---|---|
| Kunafa Nabulsiyeh | Palestine/Jordan | Shredded, Coarse | Orange Blossom Syrup |
| Knafeh bil Jibn | Syria/Lebanon | Semolina Base | Salty Cheese Filling |
| Kunafa bil Ashta | Lebanon | Fine, Thread-like | Rose Water Cream |
| Egyptian Konafa | Egypt | Single Layer Crust | Mastic in Filling |
Some authentic recipes use mastic gum. This resin adds a subtle, pine-like depth to the cream filling.
Whether you follow a traditional method or add your own touch, these desserts connect you to a rich heritage.
Troubleshooting Common Recipe Challenges
Don’t worry if your first attempt isn’t flawless; common issues have simple fixes. This guide helps you solve them quickly.
Maintaining the Right Cream Consistency
A runny cream filling often means the cornstarch didn’t activate. You must bring the milk mixture to a full boil for one minute.
Keep whisking over medium heat. This ensures the thickener works properly for a pudding-like texture.
Ensuring a Crispy Dough Texture
Clarify your butter or ghee to remove milk solids. These can make the pastry soggy instead of golden brown.
If the bottom isn’t browning, check your oven rack position. A metal pan conducts heat better than glass.
For leftovers, reheat in a conventional oven for ten minutes. A microwave will ruin the crispness.
Also, avoid stirring the sugar syrup once it boils. This prevents crystallization for a smooth pour.
FAQ
Conclusion
Bringing this iconic Middle Eastern dessert to your table is a celebration of flavor and tradition. Mastering this recipe lets you share a piece of that heritage on any special day.
Focus on high-quality ingredients like fresh whipping cream and aromatic rose water. Your effort ensures a rich cream filling that delights every guest.
Remember to cool your sugar syrup completely before pouring it over the hot pastry. This keeps the crust perfectly crisp.
Whether you’re new to baking or have years of experience, learning to make kunafa is a rewarding journey. We hope this guide helps you create a memorable dessert that brings your family together.